Connect a Form to Google Spreadsheet The Easy Way
Tired of manually exporting form submissions? You’re not alone. Connecting your online form directly to a Google Spreadsheet is a total game-changer, instantly zapping every new entry into a neat, organized row of data.
This simple bit of automation builds a real-time database for you, turning submissions into actionable information the second they arrive.
Why Connecting a Form to Google Sheets Is a Must-Do
Let's be honest, manually copying and pasting form submissions is a huge time-sink. It’s not just tedious work; it slows everything down and is a recipe for human error. One wrong copy-paste and you’ve got a lost lead or skewed survey data.
The real win here is the ability to efficiently automate data entry, which completely changes how you manage information. By creating a direct link from your form to Google Sheets, you’re building a responsive, data-driven workflow from day one.
Unlock Real-Time Data and Make Faster Decisions
Imagine this: a potential customer fills out your lead generation form, and their details instantly pop up in your sales pipeline spreadsheet. Your team can follow up in minutes, not hours. Or picture this: you launch a new product, and the survey responses appear live in a sheet, giving you an immediate pulse on what customers think.
This isn't just about saving a few minutes here and there. It's about making your data work for you, right now.
With this setup, your entire team gets access to the most current information, all the time. No more asking, “Hey, did someone download the latest leads yet?” The spreadsheet becomes your single source of truth.
Key Takeaway: The goal isn't just to move data around. It's to create a live, reliable data pipeline that closes the gap between submission and action. That's how you make faster, smarter business decisions.
Build a Foundation for Smarter Workflows
Once your data is flowing into Google Sheets, you can do so much more than just look at it. You can build powerful dashboards, create custom reports, or even set up a surprisingly effective CRM. We actually wrote a whole guide on that—check out how you can turn a spreadsheet into a functional CRM right here.
Think of this integration as the perfect starting point for more powerful automations down the road. In this guide, we'll walk you through the practical steps to get this set up using a tool like LeadSavvy Pro, transforming your static forms into a dynamic data engine.
Your Complete Guide to Connecting LeadSavvy Pro with Google Sheets
Alright, let's get into the fun part—building that automated bridge from your Facebook Lead Form straight into Google Sheets. What sounds complicated is actually just a few clicks with LeadSavvy Pro. I'm going to walk you through the entire setup, from connecting your accounts to the most important step: mapping your form fields correctly.
But before we dive in, here’s a quick tip that will save you a massive headache later.
Open up the Google Sheet you plan to use and create your column headers first. Give them clear, simple names like FullName, EmailAddress, and PhoneNumber. Trust me, doing this little bit of prep work now makes the field mapping stage a breeze.
Starting the Connection Process
First things first, you'll need to link your Facebook account to LeadSavvy Pro. This is a standard, secure authorization that gives the platform permission to see your business pages and the lead forms you’re running. It only asks for what it needs to grab your lead data—it won’t see your personal messages or post on your behalf.
Once you’re connected, LeadSavvy Pro will show you a list of all the Facebook pages you manage. Just pick the one that has the lead ad form you want to automate. If you're managing multiple brands or clients, they’ll all be right there, making it super easy to set up automations for each one.
Selecting Your Form and Destination Sheet
After you’ve selected your page, you'll see every active lead form associated with it. Find the specific form you’re using in your ad campaign. A common slip-up is choosing an old or inactive form, so just double-check the name to make sure you've got the right one.
Next up is connecting your Google account. Just like with Facebook, this is a secure process that lets LeadSavvy Pro see your Google Drive files. You'll then get to pick the exact Google Sheet and even the specific tab (like "Sheet1") where you want your new leads to show up. See why preparing that sheet beforehand was a good idea? It’ll be right there waiting for you.
This old way of doing things is exactly what we're trying to eliminate.
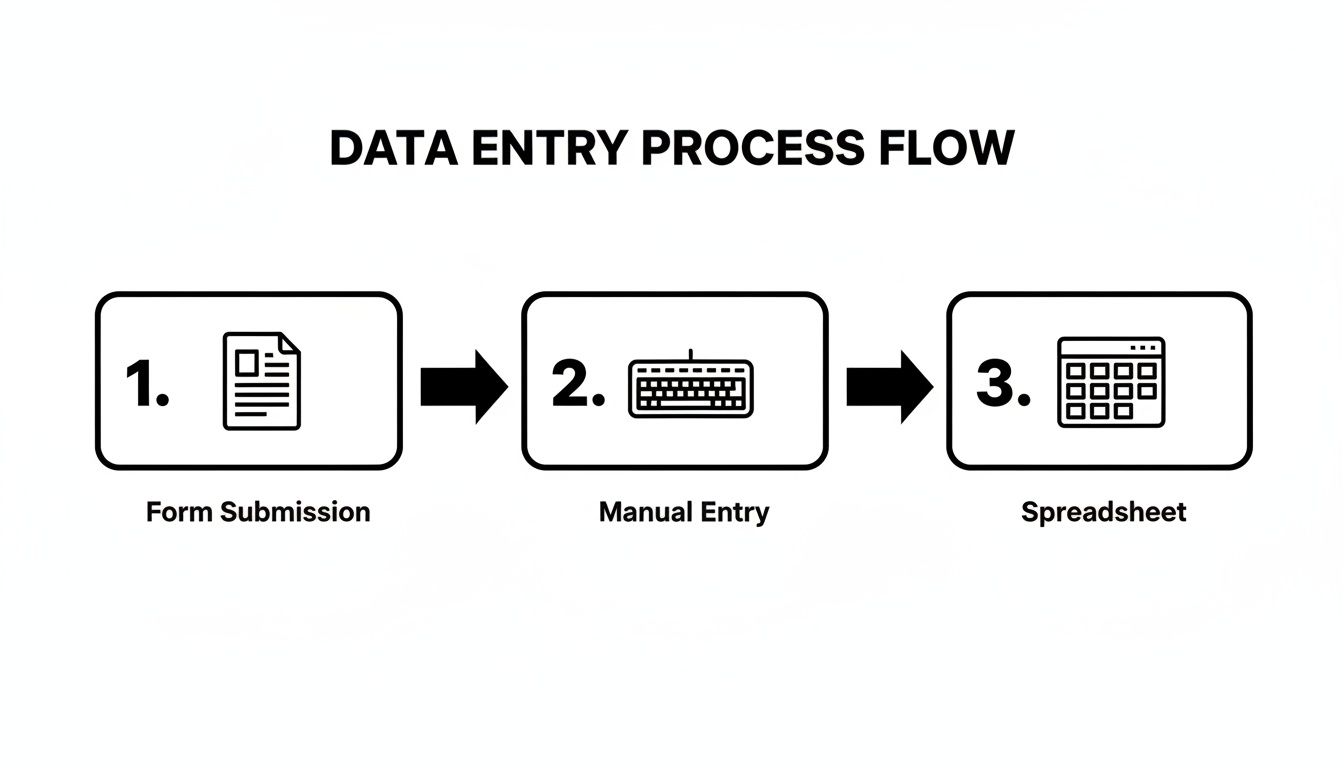
Automation completely removes that manual entry step, creating a direct, error-free pipeline for your data.
Mapping Your Form Fields to Spreadsheet Columns
This is where the magic happens and the most critical step in setting up your form to Google Spreadsheet connection. Field mapping is basically you telling the system, "Hey, when someone puts their name in the 'Full Name' field on my form, I want you to drop that info into the 'FullName' column in my spreadsheet."
LeadSavvy Pro makes this simple with a two-column interface. On the left, you’ll see the fields from your Facebook Lead Form (like full_name or email). On the right, you’ll see dropdown menus populated with the column headers from your Google Sheet.
All you have to do is match them up.
- Match
full_nameto your FullName column. - Match
emailto your EmailAddress column. - Match
phone_numberto your PhoneNumber column.
Take your time here. I’ve seen people accidentally map an email field to a phone number column, and it just creates a jumbled mess for the sales team.
Getting your field mapping right from the start ensures your data is clean, organized, and immediately usable. This table breaks down some best practices to avoid common errors.
Field Mapping Best Practices
| Form Field Type | Recommended Sheet Column Name | Example Data | Pro Tip |
|---|---|---|---|
| Full Name | FullName or ContactName | John Doe | Avoid splitting into "First" and "Last" unless your CRM requires it. |
| EmailAddress | john.doe@email.com | Set up data validation in Sheets to check for a valid email format. | |
| Phone Number | PhoneNumber | 555-123-4567 | Keep the format consistent. Don't mix numbers and text fields. |
| Custom Question | Question_[Topic] (e.g., Question_Budget) | "$5,000 – $10,000" | Use a short, descriptive name for custom questions to easily identify them. |
Following these simple guidelines will help you build a reliable and organized lead database right inside your Google Sheet.
Expert Tip: Facebook often passes along extra data like
created_timeorad_id. I always recommend mapping these to columns in your sheet. It gives you invaluable insight into exactly when a lead came in and which ad generated it, which is gold for optimizing your campaigns.
For an even deeper look at this process, check out our detailed guide on how to connect Facebook leads to Google Sheets. It’s packed with more examples and screenshots to make sure you nail it on the first try.
Once your fields are all mapped, you're pretty much done. The last thing to do is enable the connection and decide if you want to turn on email notifications. This will ping you every time a new lead lands in your sheet, so you’re always in the loop without having to live inside the document.
With that, your automation is live. Now you can sit back and watch the leads roll in.
How to Test Your Connection and Verify Data Flow
An automation is only as good as its reliability. After you've set up the integration from your form to Google Spreadsheet, you can’t just cross your fingers and hope it works. You absolutely have to test the connection to make sure data is flowing accurately from the second a user hits "submit."
Think of this as a crucial quality control step. It’s what prevents data loss and gives you real confidence in your shiny new workflow.
For Facebook Lead Ads, the easiest way to do this is with their built-in Lead Ads Testing Tool. This thing is a lifesaver. It lets you fire off a "real" lead submission through your form without it being tied to an actual ad click, simulating the entire process perfectly. It's the best way to see your automation in action.

Just select your page and the form you connected to create a test lead. Once you hit submit, pop over to your Google Sheet. The new entry should appear almost instantly.
Your Data Verification Checklist
Seeing the data show up is a great start, but don't stop there. Now you need to get granular and scrutinize it. Run through this quick checklist to confirm everything landed exactly where it was supposed to. Trust me, this will catch any pesky mapping errors before they mess up hundreds of real leads.
I always recommend sending a few different test submissions with varied data—try a name with a hyphen, a different phone number format, or a longer email address. This is how you spot potential formatting issues early on.
Here’s what to look for in your Google Sheet:
- Correct Column Mapping: Is the first name actually in the "FullName" column? Is the email address where you expect it to be?
- Data Integrity: See any weird characters or formatting bugs? For example, is a phone number showing up as one long string of numbers instead of a properly formatted one?
- Timestamp Accuracy: If you mapped a
created_timefield, does it reflect the exact time and date of your test? - All Fields Present: Did every single field from your test make it over? Scan for any empty cells where data should be.
Pro Tip: Don't just run one test. Create at least three different sample leads. This small time investment upfront will save you from a massive data cleanup headache down the road. A 75% accuracy rate is a failing grade for lead data; you need it to be perfect every time.
By thoroughly testing and verifying your connection, you ensure the data flowing into your Google Sheet is clean, accurate, and ready for your team to use. This final check is what solidifies your automated workflow and gives you complete peace of mind.
Exploring Other Ways to Get Your Form Data into Sheets
While LeadSavvy Pro gives you a direct, powerful way to connect your Facebook forms straight to a spreadsheet, it’s just one tool in a much bigger world. Knowing what else is out there helps you pick the right solution for any project, whether it's a simple internal survey or a full-blown marketing automation.
Ultimately, the best method really depends on your specific needs. For a lot of people, the simplest path is the right one.
The Native Google Forms and Sheets Connection
The most direct way to get a form to Google Spreadsheet is by sticking within Google’s own ecosystem. If you build your form using Google Forms, you can link it to a new or existing Google Sheet with a single click. It’s right there in the "Responses" tab.
This native connection is rock-solid and perfect for things like internal data collection, basic event sign-ups, or simple customer feedback forms. It’s free, super intuitive, and you don’t need to know a thing about code. The only catch? It only works with Google Forms. If you're using another form builder, you'll need a different approach.
Using Universal Connectors Like Zapier
When your needs get a bit more complex, automation platforms like Zapier or Make are your best friends. Think of them as universal translators that help thousands of different apps talk to each other. You can link pretty much any form builder—from Typeform to a custom form on your website—directly to Google Sheets.
But the real magic is in creating multi-step workflows. For instance, you could set up a "Zap" where a new form submission automatically:
- Adds a new row to your Google Sheet.
- Creates a new contact in your email marketing tool.
- Pings your sales team with a Slack notification.
These platforms are incredibly powerful, but that power usually comes with a subscription fee, especially if you have complex workflows or a high volume of submissions. If you're leaning this way, it's smart to get familiar with their pricing models. You can get a better feel for it by checking out our guide to using Zapier's free plan effectively.
Custom Solutions with Google Apps Script
For those who aren't afraid to get their hands dirty with code (or have a developer who isn't), Google Apps Script offers basically unlimited possibilities. It's a JavaScript-based platform that lets you write custom code that runs right inside your Google Workspace.
With Apps Script, you can build a completely custom integration tailored to your exact needs. This could mean validating data before it gets added, automatically formatting rows based on certain answers, or even triggering complex calculations on the fly.
This is the path for ultimate control and customization, but it definitely has the steepest learning curve. It’s the perfect fit for unique business challenges where off-the-shelf tools just don’t cut it.
By 2025, the ecosystem for sending form data into Google Sheets has exploded. It’s no longer just about simple connections; it's a full-on marketplace of add-ons and connectors turning Sheets into an automation beast. Industry roundups often feature tools like Sheetgo and Coupler.io that can merge, transform, and push form responses into massive enterprise workflows. Taking the time to pick the right method ensures your data flows exactly where you need it, how you need it.
Troubleshooting Common Connection Issues
Even the most buttoned-up automation can hit a snag. It happens. If your form-to-Google-Spreadsheet connection starts acting up, it’s almost always a small, fixable issue. Don't panic—let's walk through the most common hiccups and get you back on track fast.
Most of the time, problems fall into one of three buckets: data isn't showing up at all, it's landing in the wrong place, or a pesky error message just won't go away. We'll tackle them one by one.

When Data Goes Missing
This is the one that causes the most heartburn—a lead fills out your form, but your spreadsheet is empty. Crickets. Before you start pulling your hair out, always check the simplest things first. More often than not, it's just a permissions issue.
Your Google Account might have timed out its authentication with the third-party tool you're using (like LeadSavvy Pro). The fastest fix? Just disconnect and reconnect your Google account within the tool’s settings. This simple step forces a refresh of the permissions token and solves the problem over 80% of the time.
Also, make sure you’re logged into the correct Google account in your browser—the one you originally used to set up the whole integration. It's a surprisingly common oversight.
Correcting Mismatched Data
What if data is coming through, but it’s a complete mess? Phone numbers are in the email column, and names are where the notes should be. The culprit here is almost always your field mapping. This happens when the wires get crossed between your form fields and your spreadsheet columns.
Jump back into your integration settings and take a close look at the mapping. It's easy to accidentally select the same spreadsheet column for two different form fields.
- Look for Duplicates: Did you map both
first_nameandfull_nameto the same "Contact Name" column by mistake? - Check Your Column Headers: Make sure the column headers in your Google Sheet haven't been accidentally renamed or deleted. The integration is looking for an exact match.
- Watch for Hidden Characters: Sometimes a stray space in a column header (like
"Email "instead of"Email") is enough to break the mapping. These tiny typos are easy to miss.
A clean data set is a useful data set. Taking five minutes to double-check your field mapping will save you hours of manual cleanup later. It’s the bedrock of a reliable automation system.
Quick Troubleshooting Guide
When things go wrong, a quick diagnosis is everything. I've put together this table to help you spot the symptom and jump straight to the most likely fix.
| Symptom | Potential Cause | Solution to Try First |
|---|---|---|
| No new leads appearing | Authentication expired | Disconnect and reconnect your Google account in LeadSavvy Pro. |
| Data in wrong columns | Field mapping error | Review and correct the field mapping in your integration settings. |
| "Permission Denied" error | Wrong Google account | Ensure you're logged into the correct Google account. |
| Sheet is slow or frozen | Performance overload | Archive old rows to a new sheet; your sheet is getting too big. |
| Connection suddenly stops | Column header changed | Verify that column names in Google Sheets match the mapping exactly. |
Think of this as your first line of defense. Most issues can be knocked out in just a few clicks by checking these common culprits.
Performance and Scaling Considerations
So, what happens when your lead volume explodes? You might notice your Google Sheet getting slow, laggy, or even freezing up. This isn't an error with the connection itself, but a performance bottleneck with spreadsheets.
While Google Sheets has a technical limit of 10 million cells, real-world performance problems start popping up way sooner. I’ve seen teams report serious slowdowns once a sheet grows beyond a few thousand rows, especially if it’s loaded with formulas or has a lot of people in it at once. You can dig into more of these performance thresholds in recent how-to resources comparing Sheets to dedicated tools.
If your sheet becomes unresponsive, it’s probably time to start a fresh one for the next month or quarter. And if you're handling thousands of leads regularly, that's a clear signal you've outgrown a spreadsheet and should start looking at a proper CRM or database.
Got Questions? We’ve Got Answers.
Once you’ve got your form hooked up to your Google Sheet, a few real-world questions almost always pop up. It's one thing to get it working, but it's another to make it work for you. Here are some of the most common things people ask after getting their automated workflow running.
Can I Send Leads to a Sheet I’m Already Using?
Yes, absolutely. You don’t have to start with a blank slate every time.
Most good integration tools, including LeadSavvy Pro, let you pick an existing Google Sheet as your destination. You can even point it to a specific tab, which is perfect if you want to pipe leads from different ad campaigns or forms into one master spreadsheet.
Just make sure that the sheet you choose has clear column headers in the first row. If it doesn't, just add them in before you start mapping your form fields. This makes the connection process a whole lot smoother.
How Fast Is the Sync? Will I See Leads Instantly?
The sync should feel pretty much instant. For most setups, whether you're using Google's native connection or a tool like LeadSavvy Pro, a new submission pops up as a new row in your spreadsheet in just a few seconds.
If you ever notice a long delay, it's usually just a temporary hiccup with an API or, in some cases, a sign that your spreadsheet has gotten so massive that it's struggling to keep up.
A Quick Heads-Up: While the sync is incredibly fast, these connections rely on the APIs of the services they're linking. A rare, brief outage on either end could cause a short delay, but you almost never have to worry about data actually getting lost.
Will This Work with My Specific Form?
That all depends on the tool you're using. If you’re just connecting a Google Form to a Google Sheet, that’s a closed loop—it only works within Google’s ecosystem.
But if you’re using a connector like Zapier or a dedicated tool like LeadSavvy Pro, you can hook up almost any kind of form you can think of. We're talking Facebook Lead Ads, custom forms on your website, landing page builders—you name it. That's the real advantage for anyone managing leads from a few different marketing channels.
Since its launch back in 2008, Google Forms has become a go-to for many businesses, largely because of how well it plays with Sheets. In fact, by 2025, it was reported that about 75% of companies using Google Forms send responses straight to Google Sheets to automate their work. You can explore more insights on form connections to see just how common this is.
What Happens if I Change My Form?
This is a big one, so pay close attention. If you add, remove, or even just rename a field on your live form, you must go back and update the field mapping in your integration tool.
The connection isn't smart enough to figure out the changes on its own. If you forget this step, new data will either get lost entirely or end up in the wrong columns.
Here’s a pro tip: Before you edit a live form, pause any ad campaigns pointing to it. Make your changes to the form, immediately jump into your integration tool to fix the mapping, test it once, and then turn your campaign back on.
Ready to stop messing with CSV downloads and get your leads delivered in real time? LeadSavvy Pro makes connecting your Facebook forms to Google Sheets a breeze. Start your free plan today and get your lead flow on autopilot at https://leadsavvy.pro.