A Guide to Facebook Lead Generation Forms
A Facebook lead generation form is a special kind of form built right into the Meta platform. It lets you grab info from potential customers without ever making them leave the Facebook or Instagram app.
The best part? It pre-populates with user data like their name and email, making it dead simple for them to submit. This tiny feature is a game-changer for boosting your conversion rates.
Why Facebook Lead Forms Are Essential for Marketers

Let's be real. Getting someone to stop their endless scroll, click a link, wait for a landing page to load, and then manually type in all their info is a huge ask. Every extra click and every second of load time is another chance for them to bail.
This is exactly the friction that kills conversions, and it's the exact problem a Facebook lead generation form solves.
By keeping the entire experience inside the familiar Meta world, you're meeting people where they're already comfortable. No slow-loading external pages. No clunky mobile sites. The form just pops up, creating a smooth, instant bridge from their interest to your lead list.
The Power of Pre-Populated Fields
The single biggest win with these forms is their ability to pre-fill information straight from a user's profile. Think about it—their name, email, and phone number are already there. All the user has to do is give it a quick once-over and tap "Submit."
This small detail has a massive impact. It turns what was a chore into a completely effortless action. It's why lead forms so often crush the performance of traditional landing pages, especially on mobile, where the vast majority of Facebook's audience lives.
We've all seen how much of a pain it is to fill out forms on a small screen. Facebook's approach eliminates that headache entirely.
To put it in perspective, let's quickly compare the two.
Lead Form vs Landing Page: A Quick Comparison
When you're deciding between an in-app lead form and a traditional landing page, the choice often comes down to speed versus control. Facebook lead forms are built for speed and simplicity, which is a huge advantage in the fast-paced world of social media. Traditional landing pages offer more space for branding and detailed information, but often at the cost of higher user friction.
Here's a quick breakdown of the key differences:
| Feature | Facebook Lead Form | Traditional Landing Page |
|---|---|---|
| User Experience | Seamless, in-app | Requires leaving the app |
| Form Fields | Pre-populated, easy to submit | Manual entry required |
| Load Time | Instant | Can be slow, especially on mobile |
| Conversion Rate | Typically higher | Often lower due to friction |
| Customization | Limited design options | Full brand and design control |
Ultimately, for most quick-turnaround lead generation campaigns, the speed and efficiency of a Facebook Lead Form make it the superior choice. It's designed to capture intent the moment it strikes.
More Than Just Volume—It's About Quality
While the sheer ease of use helps bring in a higher volume of leads, the real magic is how you can use the form to qualify them. This isn't just about stuffing your pipeline with more names; it’s about getting the right names.
You can customize your Facebook lead generation form with questions that help you figure out a prospect's needs, their budget, or their timeline—all before your sales team even sees the lead.
This is a fundamental shift from a "more is better" mindset to a "quality over quantity" approach. It lets your marketing be more targeted and your sales team be far more efficient, focusing their time on people who are genuinely interested and ready to talk.
Statistically, lead generation is a huge deal for marketers, with about 50% saying it's a top campaign priority. While businesses pull in leads from all over, Facebook lead ads are standout performers with a reported 9.21% conversion rate. That number is incredibly strong, especially when you see the average ad click-through rate on Facebook is just 0.90%.
At the end of the day, a Facebook lead form is more than a simple contact collector. It’s a strategic tool built for how people actually behave online, giving you a direct and highly efficient way to connect with your most valuable audiences.
Alright, let's get into the nitty-gritty of building your first high-converting lead form. It’s time to move from theory to action and get your hands dirty inside Facebook Ads Manager.
This isn't just about ticking boxes and filling out fields. Creating a solid Facebook lead generation form means making strategic choices that directly influence who responds to your ad and, just as importantly, how qualified they are.
Getting Started in Ads Manager
First things first: you need to tell Facebook what you're trying to accomplish. The entire process kicks off by setting the right campaign objective. Inside Ads Manager, you'll pick 'Leads' as your goal. Simple. This one click tells the algorithm you're not just chasing likes or views—you want actual contact info from people who are interested in what you offer.
Once you’ve set your campaign objective to 'Leads,' you’ll work your way down to the ad level. This is where the magic happens and you'll find the option to create a new form. Facebook calls it an "Instant Form," and the name says it all. It’s built for speed.
From here, you'll start piecing together the key components of your form. Think of each part as a chance to build trust and set clear expectations with your potential leads.
Expert Tip: I always tell clients to think of their lead form like a digital handshake. The introduction is your opening line, the questions are the conversation, and the thank-you screen is your "nice to meet you." Every element should feel natural and add value.
This diagram gives you a bird's-eye view of the whole workflow.
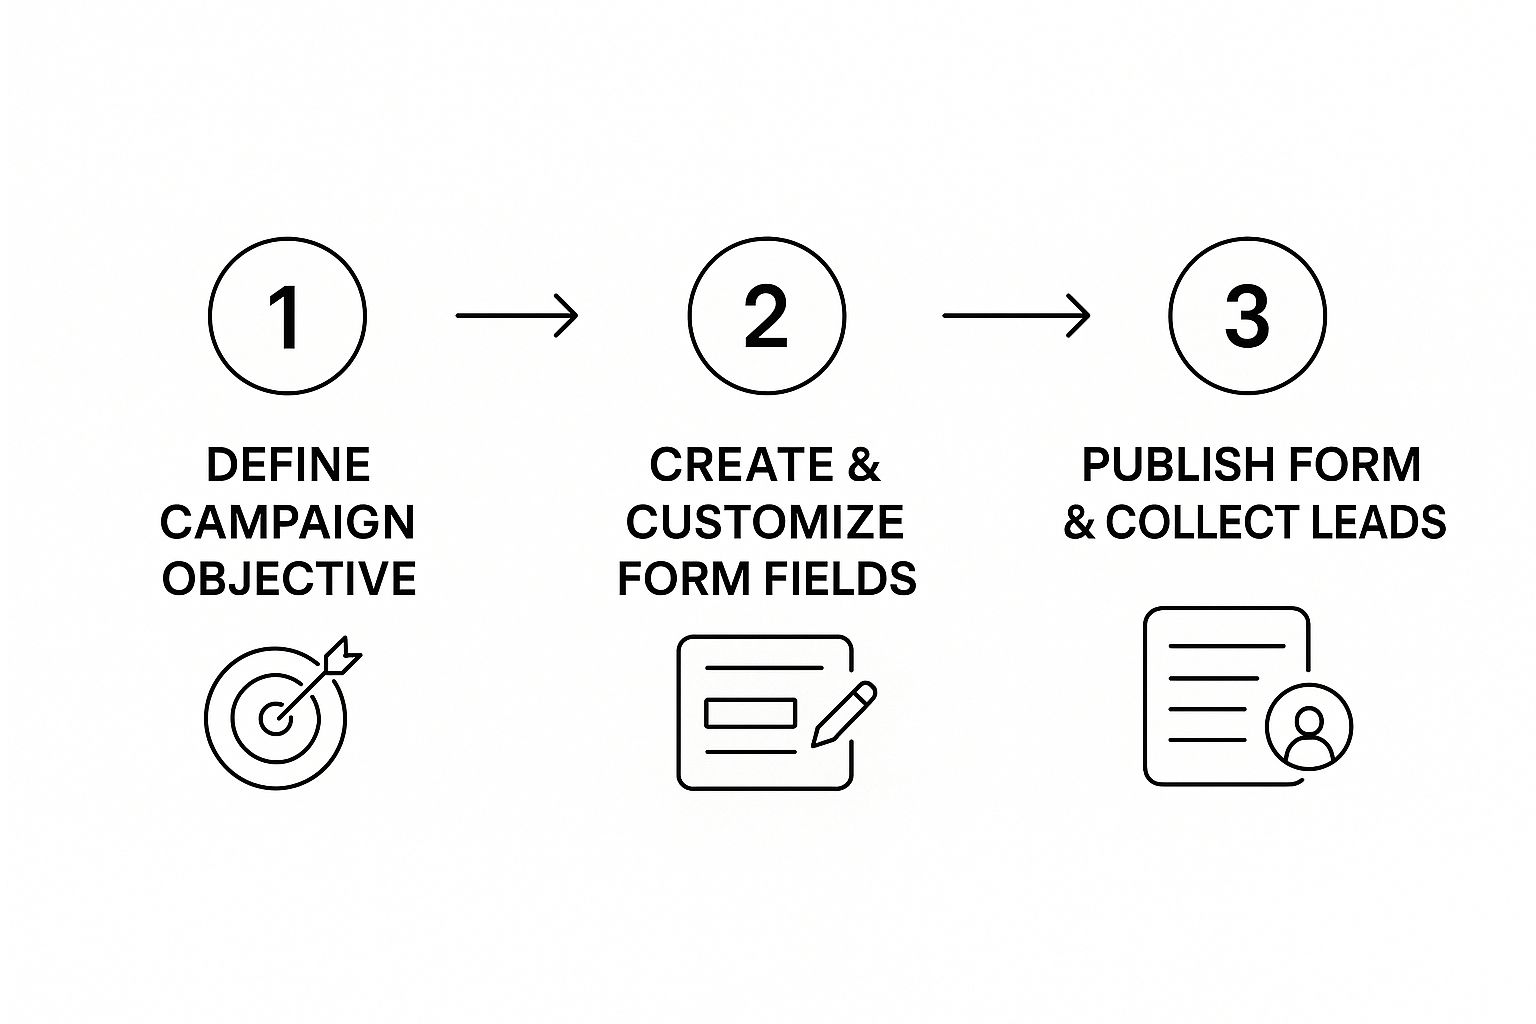
It boils down to three core phases: defining your objective, actually building the form, and then launching it to start collecting those valuable leads.
Building Out the Form Sections
Your Instant Form is split into several key parts. Let's break down what each one does and how you should approach it.
-
Form Type: You get two choices here: 'More Volume' or 'Higher Intent'. 'More Volume' is the default and it’s designed to get you the maximum number of submissions, fast. 'Higher Intent' adds a review screen where users can double-check their info before hitting submit. This little bit of friction can seriously improve lead quality by weeding out accidental clicks.
-
Intro: This is your elevator pitch. Use a punchy headline and a few bullet points to remind people exactly why they should hand over their details. Don't assume they remember the ad perfectly.
-
Questions: This is the heart of your form. Facebook lets you add pre-fill questions (like name and email, which are pulled from their profile) and your own custom questions. The trick is striking the right balance.
For a much deeper look into the nuts and bolts of form creation and getting the most out of it, check out our complete guide on the Facebook lead form.
A Real-World Strategy for Your Questions
The questions you ask should be a direct reflection of your business goals. Let's look at how this plays out in two totally different scenarios.
Scenario 1: A B2B Software Company
Imagine a company selling project management software. They need to qualify leads for a hungry sales team, so a name and email just won't cut it.
- Pre-fill Fields: First Name, Last Name, Work Email.
- Custom Questions (Multiple Choice):
- "What is your company size?" (1-10, 11-50, 51-200, 200+)
- "What is your biggest project management challenge?" (Tracking deadlines, Team collaboration, Reporting)
- Short Answer Question: "What is your job title?"
This setup gives the sales team immediate context so they can tailor their follow-up and have a much more productive conversation.
Scenario 2: A Local Gym
Now, think about a local gym offering a free one-week pass. Their goal is volume. They just want to get people through the door.
- Pre-fill Fields: Full Name, Email, Phone Number.
- Custom Question (Multiple Choice):
- "Which class are you most interested in?" (Yoga, CrossFit, HIIT)
See the difference? Here, the custom question isn't for qualification—it's for personalization. The gym can now send a follow-up email that speaks directly to that person's interest, making it far more relevant. They ask for less to reduce friction and get more sign-ups.
Finally, you'll set up the Privacy Policy (you absolutely need a link to this page on your website) and the Thank You Screen. Don't waste the thank you screen! Use it to manage expectations. Tell leads when and how you'll be in touch, or even better, give them a button to visit your site or download their resource right away. It closes the loop and leaves a great final impression.
Optimizing Your Form for Quality and Conversion

Getting your form live is just the first step. The real magic happens in the tweaks and strategic decisions you make from here on out. This is where you go beyond the basics to actively manage the quality and intent of every lead you capture.
One of the most powerful, yet easily missed, settings you’ll find is the Form Type. Your choice here really sets the tone for your entire lead generation campaign.
More Volume vs. Higher Intent
When you build your form, Facebook gives you two very different paths: ‘More Volume’ and ‘Higher Intent’. They sound simple, but their impact on your campaign's bottom line is huge.
‘More Volume’ is the default setting for a reason—it’s built for speed. It strips out as much friction as possible to get you the maximum number of submissions. It’s perfect for low-commitment offers like a newsletter sign-up or a simple content download where your main goal is casting a wide net.
‘Higher Intent’, on the other hand, adds one simple but crucial step. Before someone can submit their info, a review screen pops up asking them to confirm their details are correct.
This single confirmation step acts as an incredible quality filter. It forces a moment of pause, which dramatically cuts down on accidental submissions and weeds out people who aren't truly interested. If you're running ads for high-value offers like consultation requests or quote forms, this setting is a must. It ensures your sales team spends its time on leads who have consciously raised their hand.
Think of it this way: 'More Volume' is like grabbing a stack of business cards at a trade show. 'Higher Intent' is like having a quick, qualifying chat with each person before they hand you their card. One fills your pipeline, the other fills it with actual prospects.
This kind of strategic thinking is at the heart of any successful Facebook lead generation form. You have to align the form’s mechanics with your business goals. Facebook already gives you a huge advantage by pre-filling user data like names and emails, which, as this overview of Facebook Lead Ads points out, drastically reduces friction. Choosing ‘Higher Intent’ just adds that final layer of qualification to an already powerful setup.
Aligning Ad Creative with Form Expectations
Your form doesn’t live in a bubble. The ad that gets people there plays a massive role in pre-qualifying your audience before they even click. Your ad copy and visuals need to set crystal-clear expectations.
If you’re offering a free ebook, show a mockup of the cover. If it’s a webinar, use a headline that screams, “Register for Our Free Webinar.” This kind of transparency ensures that the only people who click are the ones genuinely interested in what you’re offering.
A vague ad leads to curious, low-intent clicks. A specific ad leads to motivated, high-intent submissions.
The Art of A/B Testing Your Form
Never, ever assume your first draft is your best one. The real secret to unlocking peak performance is continuous testing. Your goal is to systematically test one element at a time to find the combination that delivers the highest quality leads for the lowest cost.
Here are a few high-impact elements you should be testing right away:
- Headlines: Pit a benefit-driven headline ("Get Your Free Marketing Plan") against a question ("Struggling with Your Marketing?"). See what resonates.
- Form Fields: What’s the sweet spot for the information you ask for? Start with the basics (name, email). Then, try adding just one more qualifying field, like "Company Size." Watch your completion rates and see if the lead quality justifies any drop-off.
- Call-to-Action Button: "Submit" is fine, but it's boring. Test more descriptive CTAs like "Get My Free Quote" or "Download Now." The button text should echo the value the person is about to receive.
By isolating these variables and testing them one by one, you’ll gather clean data on what really drives your audience to act. This is the process that separates the pros from the amateurs. It turns your lead form from a simple data collection tool into a finely tuned conversion machine.
Integrating and Automating Your Lead Flow
Getting a lead with a well-designed Facebook lead generation form is a fantastic start, but it's only half the battle. The real magic—and the real money—is in what happens next. Speed is everything.
If your current process is manually downloading a CSV file from Ads Manager once or twice a day, you're practically throwing away leads. A hot lead goes cold in minutes. This is where the concept of speed-to-lead comes into play. It's the critical window between when a prospect shows interest and when your team actually follows up. Any manual step creates a delay, giving your competitors a wide-open shot at talking to your lead first.
This is why automation isn't just a nice-to-have; it's a must-have for winning in today's market.
The Power of Real-Time Lead Syncing
Imagine this: the second a potential customer hits "submit" on your Facebook form, your sales team gets a notification. They can engage while your brand is still fresh in the prospect's mind, instead of finding that lead buried in a report hours later.
That's the power of integrating your Facebook lead forms directly with your other business tools.
Connecting your forms to a CRM, an email platform, or even a simple Google Sheet in real-time completely changes the dynamic. It closes the painful gap that often exists between your marketing ads and your sales follow-up.
A lead captured at 9 AM should be in your sales rep's hands by 9:01 AM, not downloaded in a batch report that afternoon. This immediacy is what turns advertising spend into tangible revenue.
This automated connection gives your team the power to act fast. They can instantly trigger a welcome email, add the lead to a specific nurture campaign, or get a ping to make a phone call. Want to go deeper on this? Check out our guide on how to automate your lead generation.
Tools for Seamless Integration
The good news? You don't need to be a coding genius to set this up. There are plenty of tools designed to build that bridge between your Facebook account and the platforms where you do business.
- Native CRM Integrations: Some CRMs have built-in connections with Facebook Lead Ads. It's always worth checking your CRM’s app marketplace first.
- Automation Platforms: Tools like Zapier or Make are fantastic for building custom "if this, then that" workflows between thousands of apps.
- Specialized Connectors: This is where a dedicated solution like LeadSavvy Pro really shines. It's built for one core purpose: syncing your Facebook leads directly to a Google Sheet or your CRM, without any complicated setup.
The right tool really depends on your tech stack and how complex your needs are. For most small to mid-sized businesses, a purpose-built connector is the simplest and most reliable way to get automation up and running.
Closing the Data Loop for Smarter Ads
Automating your lead flow isn’t just about speed—it’s about getting smarter. When you sync your CRM back to Meta's systems, you create a powerful feedback loop.
By connecting your CRM to Facebook's Conversions API, you can send lead status updates back to the ad platform. For example, you can tell Facebook which leads became qualified, which ones turned into customers, and which ones went cold. This trains Facebook's algorithm to find more people like your best customers, not just people who like filling out forms.
Yes, this data-driven strategy might increase your cost per lead initially, but the return on investment (ROI) almost always skyrockets because the quality of the leads is so much higher. You can learn more about these advanced lead generation ad practices to see how this feedback loop works in detail.
This is how you level up from simply collecting contact info to generating real, measurable business growth.
Common Lead Form Pitfalls and How to Fix Them

So you've launched your Facebook lead generation form, but the results are… underwhelming. If your campaign is sputtering, it's probably not one big, catastrophic failure. In my experience, it’s usually a handful of small, completely fixable issues that are quietly sabotaging your success.
The good news? These problems are incredibly common, and the solutions are straightforward. Once you know what to look for, you can diagnose what’s wrong, make a few quick tweaks, and get your campaign back on track.
Let's dive into the most frequent mistakes I see marketers make and, more importantly, how to sidestep them.
Pitfall #1: You’re Asking for Way Too Much Information
This is the absolute number one killer of lead form conversions. Every single field you add creates more friction. Think about it—people are busy, and they're protective of their personal data. When they click your ad and see a form that looks like a tax return, they're gone. Instantly.
The fix is simple: be ruthless.
Start with the 'Rule of 3'—ask for no more than three essential pieces of information. Stick to pre-fill fields like name and email whenever you can, since they require zero typing from the user.
If you absolutely need more details to qualify someone, use multiple-choice questions instead of asking them to type out a long answer. It’s faster and less intimidating.
Key Takeaway: The goal of the lead form is to start the conversation, not to conduct a full-blown interview. You can always gather more info during your follow-up. If a field isn't 100% necessary to make that first contact, cut it.
Pitfall #2: Your Privacy Policy is Missing or Weak
Facebook is a stickler for this, and for good reason. Users deserve to know what you’re doing with their information. A huge reason ads get rejected is a missing or non-compliant privacy policy link. I see it all the time—marketers just link to their website's homepage, and Meta’s review team flags it immediately.
Your form must link directly to a dedicated privacy policy page on your website. No shortcuts.
This page needs to clearly explain:
- What information you are collecting
- Why you are collecting it
- How you plan to use and store it
- A clear statement that you won't sell their data
A proper privacy policy doesn't just keep your ads running smoothly; it builds critical trust. It signals that you're a professional and legitimate business, which makes people more comfortable giving you their details.
Pitfall #3: Your Follow-Up Takes Forever
Look, capturing a lead is only half the battle. The value of that lead decays with every single minute that passes. Manually downloading a CSV file of leads once a day from Ads Manager is a recipe for burning through your ad spend with nothing to show for it. It's a proven fact: responding to a lead within the first five minutes can skyrocket your conversion rates.
If a lead waits hours—or worse, days—for you to get in touch, their initial interest is long gone. They've probably already forgotten they even filled out your form, or worse, they've been contacted by one of your competitors.
The only real solution here is automation. A real-time connection between your Facebook lead form and your sales process isn't a "nice-to-have" anymore; it's essential for success.
Troubleshooting Common Lead Form Issues
Feeling overwhelmed? Don't be. Most issues fall into a few common buckets. I've put together this quick-reference table to help you diagnose and fix problems on the fly.
| Common Problem | Primary Cause | Actionable Solution |
|---|---|---|
| High Form Views, Low Submissions | Asking for too much information or using too many open-ended questions. | Reduce form fields to the absolute minimum. Use pre-fill and multiple-choice options. |
| Ad Rejected or Disapproved | Missing, broken, or non-compliant privacy policy link. | Create a dedicated privacy policy page on your site and link directly to it from the form. |
| Leads Are Unresponsive or Cold | Significant delay between lead submission and sales follow-up. | Automate lead syncing to your CRM or a Google Sheet with a tool like LeadSavvy Pro for instant notifications. |
Automating your workflow with a tool like LeadSavvy Pro ensures your team gets a notification the second a new lead comes in. This immediate alert allows you to follow up while your business is still top-of-mind, turning hot prospects into real customers before they have a chance to go cold.
Your Questions About Lead Forms Answered
Once you've run a few lead gen campaigns, you’ll inevitably hit a few snags. The process seems simple at first, but then you hit a wall, or you start wondering if you’re paying way too much for each lead.
Let's dig into the most common questions we hear every day from marketers who are right there in the trenches with you. No theory, just straight, practical answers.
How Much Should I Expect to Pay Per Lead?
This is the million-dollar question, isn't it? And the honest-to-goodness answer is: it depends. There’s no magic number. Anyone who tells you otherwise is selling something.
Your cost per lead (CPL) is a moving target, and while some industry reports throw around an average of $19.68, that number can swing wildly. It's almost useless without context.
Here’s what really moves the needle on your lead costs:
- Your Industry: A lead for a local gym membership will always be cheaper than a lead for a B2B software that costs five figures a year. High-ticket or super-competitive markets naturally have higher costs.
- Your Target Audience: Going after a broad, nationwide audience is usually cheaper than targeting a niche group of VPs of Marketing in a single city. The more specific you get, the more you'll likely pay to reach them.
- Your Offer: What are you actually asking for? A simple newsletter signup is a low-friction ask, so you’ll get a lower CPL. A "Request a Demo" form is a much bigger commitment, which drives up the cost but should also bring in higher-quality prospects.
- Your Ad Creative: This is huge. Ads that resonate and get people to stop scrolling are rewarded by Meta's algorithm with better placement and lower costs. If your ad is boring or irrelevant, your CPL will climb.
Forget about a universal average. Instead, benchmark against your own past performance and, most importantly, track your CPL against the revenue each lead actually brings in. A $50 lead that becomes a $2,000 customer is a steal.
Can I Edit a Published Lead Form?
Ah, the classic frustration. The short and painful answer is no, you can't edit an Instant Form once it's published and has leads. It's a hard rule from Meta, likely to keep data consistent for ads that are already running.
So if you spot a typo right after your ad goes live, you can't just pop in and fix it. It feels like a massive oversight, but there’s a simple workaround.
Expert Tip: You can’t edit a live form, but you can duplicate it. This creates a brand-new, identical copy that you can edit before it's attached to an ad.
Here’s how you do it:
- Head over to your Forms Library in Meta Ads Manager.
- Find the form you need to change and hit "Duplicate."
- Meta will create a new draft called something like "(Your Form Name) – Copy."
- Open that new draft and make your changes—fix the typo, add a question, or tweak the thank you screen.
- Save your new, shiny, edited form.
- Finally, jump back into your ad set and swap the old form for the new one you just created.
It’s not as clean as a direct edit, but duplicating the form is the official way to get it done without rebuilding everything from scratch.
What Is the Best Way to Follow Up with New Leads?
Getting the lead is just step one. The real money is made in the follow-up. A fast, relevant, and persistent follow-up process is completely non-negotiable.
The golden rule here is speed. Seriously. Studies have shown that contacting a new lead within the first five minutes can skyrocket your chances of converting them. Every minute you wait, their interest fades, and the odds they’re already talking to a competitor go up. This is exactly why manually downloading CSV files is a campaign killer—the built-in delay murders your momentum.
Your follow-up shouldn't just be one email. It needs to be a thoughtful sequence across different channels.
A Sample Follow-Up Cadence That Works
- Instantly (Under 5 Minutes): An automated welcome email goes out. This confirms you got their info and sets expectations. If it's a high-intent lead (like a demo request) and they left a phone number, this is the time to make the first call.
- Day 1: If you haven't connected, send a second, more personal email. Mention the specific thing they signed up for.
- Day 3: Try another call, but at a different time of day. If you have permission, send a quick text message.
- Day 5: Send a final "break-up" email. It sounds counterintuitive, but a polite, last-chance message often gets a response, even if it's just to say "not interested right now."
The key is to add value every time you reach out, not just pester them. Remind them of the problem you solve. Send a helpful resource. Stay top-of-mind by being genuinely useful.
Don't let follow-up friction kill your campaign ROI. LeadSavvy Pro eliminates the dangerous delay between a lead submitting their info and your team taking action. Instantly sync every lead from your Facebook form directly into your workflow, so you can connect with hot prospects in minutes, not hours. See how it works at https://leadsavvy.pro.