
Add Administrators to Facebook Page: add administrators to facebook page
Learning how to add administrators to a Facebook page is pretty straightforward. You just need to hop into your Page's settings, find the "Page Access" area, and then you can invite people using their email or Facebook name. From there, you assign them a specific role, giving them full or partial control.
Simple, right? But the why behind it is what really matters.
Why Smart Admin Management Is Key to Page Growth
Let’s be real—properly managing who has access to your Facebook Page is more than just a box-ticking exercise. It's the bedrock of your business's growth on the platform.
When you thoughtfully add administrators and assign roles, you're actually building a machine for efficiency, security, and scale. Think about it: relying on one person to do everything is a huge bottleneck. What if they go on vacation, call in sick, or, worse, leave the company? Your page grinds to a halt. Messages pile up, and you miss out on real opportunities.
A multi-admin setup completely sidesteps this problem by spreading the work around. Picture this: a hot lead from a Facebook Ad lands in your inbox late on a Friday night. If the right people have access, someone can jump on it immediately instead of letting it go cold over the weekend. That kind of rapid response is often the difference between closing a deal and losing a customer.
Scaling Your Operations Securely
As your business grows, your marketing gets more complex. You'll probably bring on social media managers, ad specialists, or community moderators to help manage the load. Giving every single person full admin control is a massive security risk you don’t want to take.
Instead, assigning specific, limited roles is the smart move. It protects your Page while still empowering your team to do their jobs. For example, tools like LeadSavvy Pro need Admin access to connect and pull in your leads automatically. By having one trusted admin handle these kinds of integrations, you keep your Page secure while letting other team members manage daily content and comments without giving them the keys to the kingdom.
For anyone juggling multiple brand pages, applying these principles is crucial. We dive deeper into this in our guide on managing multiple social media accounts.
The Impact of an Active Team
Getting your team set up is the first big step. Following solid general employee onboarding best practices from the get-go ensures everyone understands their role and what's expected. This clarity pays off in a big way.
In fact, the data doesn't lie. Pages with highly engaged admin teams see real, tangible results. Statistics show that pages where administrators perform 31 to 50 actions weekly achieve a page growth rate of 5.8%. That completely dwarfs the measly 0.8% growth seen on pages where admins are barely active.
By building a team with clearly defined roles, you're not just delegating tasks. You're creating a resilient, responsive, and growth-oriented asset for your business.
Decoding Facebook Page Roles and Permissions
When it’s time to add administrators to a Facebook page, the knee-jerk reaction is to just give everyone the same access. I’ve seen it happen countless times, and it’s a mistake that can open up huge security holes for your business.
Think of it like handing out keys to your office. You wouldn't give the new intern a master key that unlocks everything from the front door to the CEO's office, right? The same logic applies to your Facebook Page. Not every team member needs full Admin access to your digital storefront.
Matching Roles to Real-World Jobs
Facebook gives you a handful of roles—Admin, Editor, Moderator, Advertiser, and Analyst—and each one is built for a specific purpose. Let’s translate these labels into actual job titles so it’s crystal clear who should get what.
- Admin: This is the master key. This role is for business owners or top-level managers only. An Admin has total control: they can add or remove people, connect tools like LeadSavvy Pro, and even delete the entire Page. Hand this role out with extreme caution. Seriously.
- Editor: This is your content creator or social media manager. An Editor can do almost everything an Admin can when it comes to content—posting, commenting, sending messages, and checking insights. The key difference? They cannot touch Page roles or settings. It's the perfect role for day-to-day management.
- Moderator: Think of this as your community watchdog. A Moderator is laser-focused on engagement. They can reply to comments, delete spam, and ban troublesome users, but they can't create original posts. This is a great fit for a virtual assistant or a customer service specialist. For more on this, check out this great resource on the key roles and importance of a community manager.
- Advertiser: This one's for your paid media specialist. They can create and manage ad campaigns and dig into the insights to see what’s working. They can’t post organic content or handle comments, which keeps their focus squarely on running your ads.
- Analyst: Your data guru. Analysts get a read-only pass to see what content is performing and who your audience is through Page Insights. They can't make any changes, making it a safe role for stakeholders or consultants who just need to see the numbers.
Making the right call on roles is crucial for scaling. Are you hitting a wall trying to do it all yourself, or are you ready to build a team and grow?
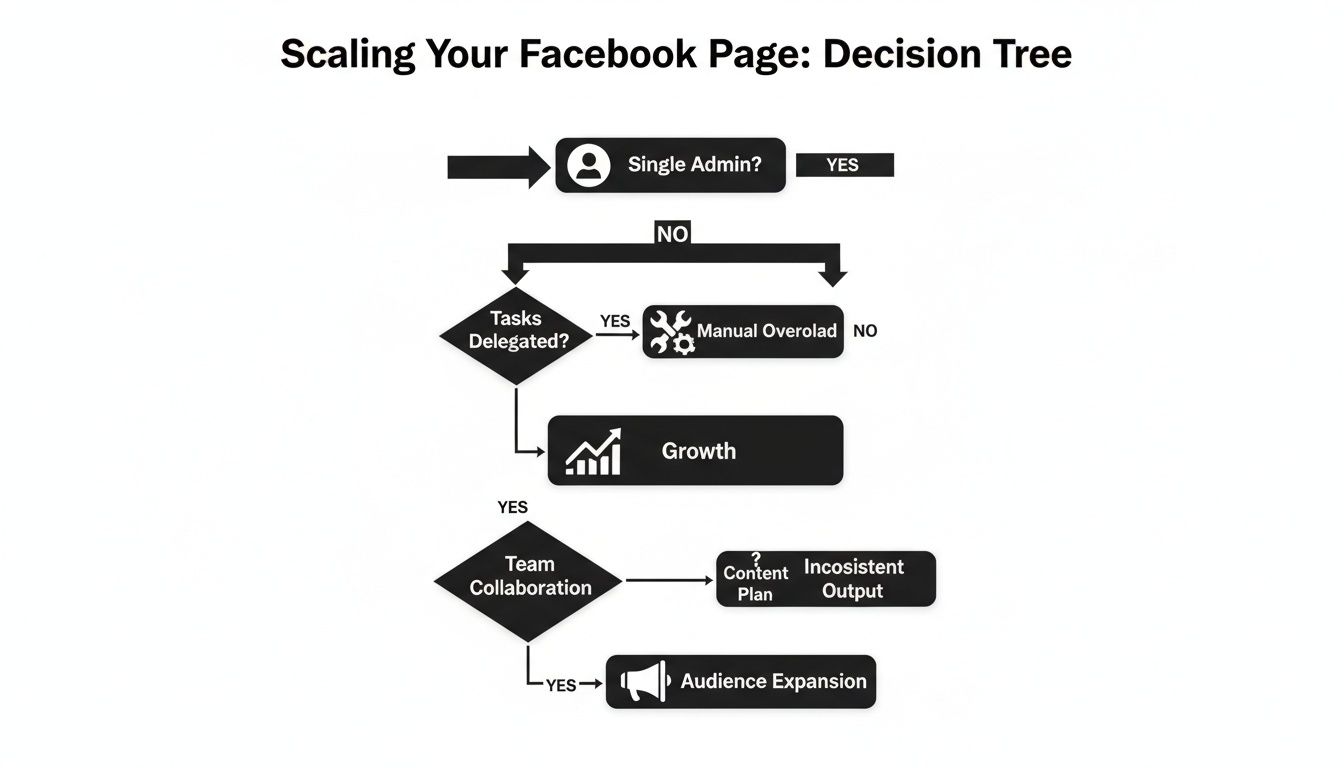
This flowchart shows it perfectly. Sticking as a single admin leads to bottlenecks, while smart delegation is the fast track to real growth.
Facebook Page Role Permissions at a Glance
To make it even simpler, here’s a quick-glance table breaking down exactly what each role can and can’t do. This will help you make the right call every time you add someone to your Page.
| Permission / Task | Admin | Editor | Moderator | Advertiser | Analyst |
|---|---|---|---|---|---|
| Manage Page roles and settings | ✅ | ❌ | ❌ | ❌ | ❌ |
| Publish and manage content | ✅ | ✅ | ❌ | ❌ | ❌ |
| Send messages as the Page | ✅ | ✅ | ✅ | ❌ | ❌ |
| Respond to and delete comments | ✅ | ✅ | ✅ | ❌ | ❌ |
| Create and manage ads | ✅ | ✅ | ❌ | ✅ | ❌ |
| View Page Insights | ✅ | ✅ | ✅ | ✅ | ✅ |
The bottom line is simple: always follow the Principle of Least Privilege.
Give people the minimum level of access they need to do their job, and nothing more. This single rule dramatically cuts down your security risks and prevents someone from accidentally messing up critical settings. It's the smartest, safest way to manage your team.
Adding Someone to Your Page on a Desktop
For a lot of us, the desktop version of Facebook is still the go-to for managing a business Page. It just feels more familiar. If you're trying to add administrators to a Facebook page, this is probably the most direct and reliable way to do it.
The steps are pretty simple, but Facebook is notorious for moving things around. Knowing exactly where to click can save you a ton of headaches digging through menus. Let's walk through it so you can get your team member added quickly and securely.
Navigating to Your Page Access Settings
First thing's first: make sure you're logged into the personal Facebook profile that already has admin rights to the Page. From there, you'll need to switch from your personal profile over to managing the business page. You can usually do this by clicking your profile picture in the top-right corner and just selecting the Page from the list.
Once you're "acting as" your Page, here's where to go:
- In the left-hand menu, find the "Settings" option. It’s usually tucked away near the bottom.
- From the Settings menu, click on "New Pages Experience." This is Facebook's updated section for handling all things related to Page management and roles.
- Now, select "Page Access." This screen is your command center for everyone who has any level of control over your Page.
You'll notice two main sections here: "People with Facebook access" and "People with task access." The difference is huge. Facebook access is for higher-level roles like Admins, while task access is for more specific, limited roles like a Moderator or Advertiser.
Sending the Invitation
Alright, you're on the Page Access screen and ready to send the invite.
Click the blue "Add New" button. This will pop up a search box where you can type in the name or email address of the person you want to invite. Make sure you use the email they have tied to their Facebook account.
As you start typing, a list of profiles will show up. Be extra careful here and double-check that you're selecting the right person—a quick glance at their profile picture can prevent a major mistake.
This next step is the most important one. You'll see a screen where you define exactly what they can and can't do.

You have to decide if you want to grant them full control. Toggling this on is what makes them an admin, giving them the keys to the kingdom—including the power to add or remove other people (even you!).
Pro Tip: For your own security, Facebook will ask you to re-enter your password before the invitation goes out. This is a good thing! It’s a final checkpoint to make sure you’re the one authorizing this major change.
Once you hit "Give Access," the invitation is officially on its way. The person you invited will get a notification and has 30 days to accept it before the link expires. Until they do, you'll see their name listed under the "Invitations" section with a "Pending" status, so you can easily track who still needs to get on board.
Managing Page Access Through Meta Business Suite
When you're running a business that's more complex than a single Facebook Page, the standard interface just doesn't cut it. Juggling multiple pages, ad accounts, and a growing team requires a real command center. That’s exactly what Meta Business Suite (what many of us still call Facebook Business Manager) was built for.
If you're serious about managing your brand professionally, learning how to add administrators to a Facebook page through Business Suite is a non-negotiable skill. It gives you a centralized, secure, and scalable dashboard to oversee all your business assets.
The Business Suite Advantage
Here’s the most important thing to understand: there's a huge difference between adding someone directly to your page and adding them to your main Business Account. When you add them to the page, that’s all they get access to—just that single page.
Inviting them into your Business Account first is the smarter, more secure way to operate. It creates a flexible structure where you can then grant them specific access to different assets—multiple pages, ad accounts, pixels, you name it. You get total control over their permissions for each one. This is the gold standard for agencies handling client work or any business with several brand pages.

Adding People to Your Business Account
The first move is always to bring the new team member into your business ecosystem. It’s a simple but vital step.
- Head over to your Meta Business Suite and click the "Settings" cogwheel.
- In the menu that appears, find and click on "People." This is your hub for everyone who has access to your business assets.
- Hit the blue "Add people" button and type in their work email address. Pro tip: always use a company email, not a personal one. It keeps things clean and professional.
- Next, you'll assign them a role for the entire Business Account. Your choices are "Employee access" or "Admin access."
Heads Up: Business Admin access is the keys to the kingdom. A Business Admin can add or remove anyone (including you!), change critical settings, and access all financial information. Only give this role to business owners or top-level managers you trust completely.
Once you've set their overall role, you'll move on to assigning access to specific assets.
Assigning Specific Page and Asset Access
This is where the real power of Business Suite comes into play. Instead of giving someone the same level of access to everything, you can get incredibly specific. The "Assign Assets" screen will show you a list of every page, ad account, and other property you own.
For instance, you might give your social media manager "Editor" access to your main Facebook Page but only "Analyst" access to a secondary page used for market research. This kind of granular control ensures everyone has exactly the permissions they need to do their job—and nothing more. For a deeper dive into managing the assets tied to your advertising, check out our Facebook Ads Manager tutorial.
Proper management is key because engagement dynamics change drastically with scale. Pages with under 10,000 fans see an average engagement rate of 0.51%, but that figure plummets to just 0.03% for pages with over 100,000 fans. As these Facebook statistics show, having a well-managed team of admins is crucial for keeping interactions high as you grow.
After you've set up their access, just send the invitation. They’ll get an email to join your Business Account, and they'll be ready to go with the exact permissions you've assigned.
Solving Common Problems When Adding Admins
Even when you follow the steps perfectly, technology can have a mind of its own. Trying to add an administrator to a Facebook page should be straightforward, but sometimes a small hiccup can bring everything to a screeching halt. Don't worry—most issues are common and have simple fixes.
Let’s walk through some of the most frequent headaches you might run into. Getting to the root of the problem is the first step toward giving your team the access they need without any frustrating back-and-forth.
The Invitation Never Arrived
This is, without a doubt, the most common issue. You've sent the invitation, but your new team member swears they never got a notification. Before you start pulling your hair out, let's check a few likely culprits.
- Wrong Email Inbox: The invite goes to the email address tied to their personal Facebook profile. Make sure they're checking that specific inbox, not their work email.
- Lost in Email Filters: Services like Gmail are notorious for sorting Facebook notifications into "Social" or "Promotions" tabs. It might have even landed in the spam folder. A quick search for "Facebook" in their email client usually turns up the missing invite.
- Check Facebook Notifications Directly: Have them log into their Facebook account and look at their notifications bell. The invitation should be waiting there, even if the email got lost along the way.
If none of that works, your best bet is to cancel the pending invitation in your "Page Access" settings and just send it again. A fresh invite often fixes the problem right away.
Why Can't I Find the Person I Want to Add?
You’re typing their name or email into the search bar, and… nothing. It’s incredibly frustrating, but this is usually not a glitch. The reason is almost always tied to their personal privacy settings on Facebook.
For you to find and invite someone, their privacy settings must allow people to search for them by their email address or name. If their profile is locked down tight, Facebook’s search simply won’t be able to find them to send the invitation.
The easiest fix is to ask the person to temporarily adjust their privacy settings. Once they've accepted the Page role, they can switch their settings right back to how they were. It’s a quick workaround that saves a lot of headaches.
Dealing with Expired Invitations
Facebook invitations don't last forever—they expire after 30 days. This is a security measure designed to stop old, forgotten invites from being accepted by the wrong person weeks or months later.
If your new admin waits too long to accept, the link will just stop working. There's no way to reactivate an expired invitation. You'll need to go back into your Page Access settings, remove the old request, and send a brand new one.
This whole process ensures that every grant of access is intentional and timely. Keeping your page secure is just as crucial as learning how to prevent data loss from your other business systems.
Your Top Questions About Facebook Page Roles
Even when you've got a handle on the basics, a few specific questions always seem to bubble up when it's time to manage Page access. I get it. You want to make a confident decision without getting lost in a maze of settings.
Here are the most common questions I hear from business owners and marketers just like you.
How Many Admins Can a Facebook Page Have?
Technically, Facebook doesn't put a hard cap on the number of people you can assign to a Page. But from a practical security standpoint, giving everyone the keys to the kingdom is a recipe for disaster.
My advice? Keep your core Admin team incredibly small—think just 2-3 highly trusted people.
For everyone else, live by the principle of least privilege. If someone just needs to post content and reply to comments, make them an Editor or Moderator. They don't need the power to change your Page name or connect new apps. The goal is to give people exactly the access they need to do their job, and not a drop more.
Every single person with full Admin access can change settings, add or remove other people (including you!), and essentially control your entire Page. Limiting that number is the simplest, most powerful security move you can make.
What Happens When I Remove an Admin From a Page?
When you remove someone from a Page role, their access is cut off instantly. Poof. Gone. They can no longer post, see your analytics, manage ads, or touch any of your settings.
Here's the crucial part: the person does not get a notification telling them they've been removed. It’s a silent, immediate action. This is precisely why you always want at least two trusted Admins on your Page. If one person accidentally removes themselves or, worse, a rogue employee locks you out, that second Admin is your lifeline to get back in.
Can an Editor Connect Third-Party Apps to the Page?
Nope, an Editor cannot connect third-party tools like LeadSavvy Pro. This is a critical security measure built into Facebook's system. Granting an application access to your Page data is a big deal, and it's a power reserved exclusively for those with full Admin permissions.
While an Editor is perfect for managing daily content, engaging with your community, and handling messages, only an Admin can approve and integrate new software with your Page.
Ready to stop manually downloading leads and start responding in real-time? LeadSavvy Pro instantly syncs your Facebook Lead Form submissions to a Google Sheet or your CRM, so you never miss an opportunity. Start for free and automate your lead capture today.