
Add Admin to Facebook Page (add admin to facebook page): The Complete Guide
Knowing how to add an admin to a Facebook Page is a fundamental skill for any business owner or marketer. At its core, it's about going into your Page's settings, finding 'Page Access,' and inviting someone new by name or email. But this simple action does so much more than just share the workload—it's a strategic move that unlocks serious growth.
Why Delegating Facebook Page Access Is a Smart Move
Bringing someone else onto your Facebook Page isn’t just about offloading tasks. It’s about turning your page into a responsive, dynamic business tool instead of a static profile. You’re building a team that can steer the ship together, making sure no customer comment or hot lead ever falls through the cracks.
Think about a busy marketing agency that just brought on a new social media specialist. They need to get into a client's Page right now to launch a time-sensitive campaign. Granting them the right access instantly prevents bottlenecks and keeps the project moving forward.
Or, picture a small e-commerce shop. When the sales team can jump directly into Page messages, they can answer product questions in real-time. That quick reply can easily turn a curious browser into a paying customer. Speed is your secret weapon.
Boost Your Performance with Active Management
This isn't just about making your life easier; delegation directly fuels your Page's growth and engagement. The data doesn't lie: pages with active, collaborative teams get far better results.
A deep dive into Facebook's own stats shows that pages with admins taking 31-50 actions a week see +5.8% page growth and a whopping 94% follower retention rate. Compare that to pages with almost no admin activity (0-5 actions), which limp along with +0.8% growth and 82% retention. The difference is stark. An engaged team is the key to elevating your page from good to great.
Free Up Your Team for High-Impact Work
One of the biggest wins from delegating access is freeing up key people to focus on strategy instead of getting bogged down in routine tasks. When one person isn't solely responsible for every post, message, and comment, they suddenly have the mental space for big-picture planning, campaign analysis, and creative brainstorming.
By spreading out the responsibilities, you empower your team members to play to their strengths. The analytics whiz can dive deep into Page Insights, while the brilliant copywriter can focus on crafting killer content. This kind of specialization leads to higher-quality work all around.
If you're looking to scale your digital presence, this strategy is a must. It often goes hand-in-hand with finding the right talent, and many businesses see incredible results from hiring remote social media managers who bring specialized expertise to the table.
Of course, juggling these roles across multiple platforms is a challenge in itself, which is why a solid workflow is so crucial. For more on that, check out our guide on managing multiple social media accounts. At the end of the day, smart delegation is the bedrock of a scalable and successful social media machine.
Understanding Facebook Page Roles and Permissions
Handing over the keys to your Facebook Page isn't a simple yes-or-no decision. It's a critical choice that directly affects your Page's security and day-to-day operations. Choosing the right level of access is crucial, whether you need to add an admin to a Facebook Page or just let a new team member handle a specific task.
Think of it like this: you wouldn't give your entire set of master keys to a temporary contractor. The same logic applies here. Each role has a distinct purpose, and knowing the difference protects your business from accidental mistakes or, worse, malicious actions.
This quick decision tree can help you figure out if it's time to start delegating.
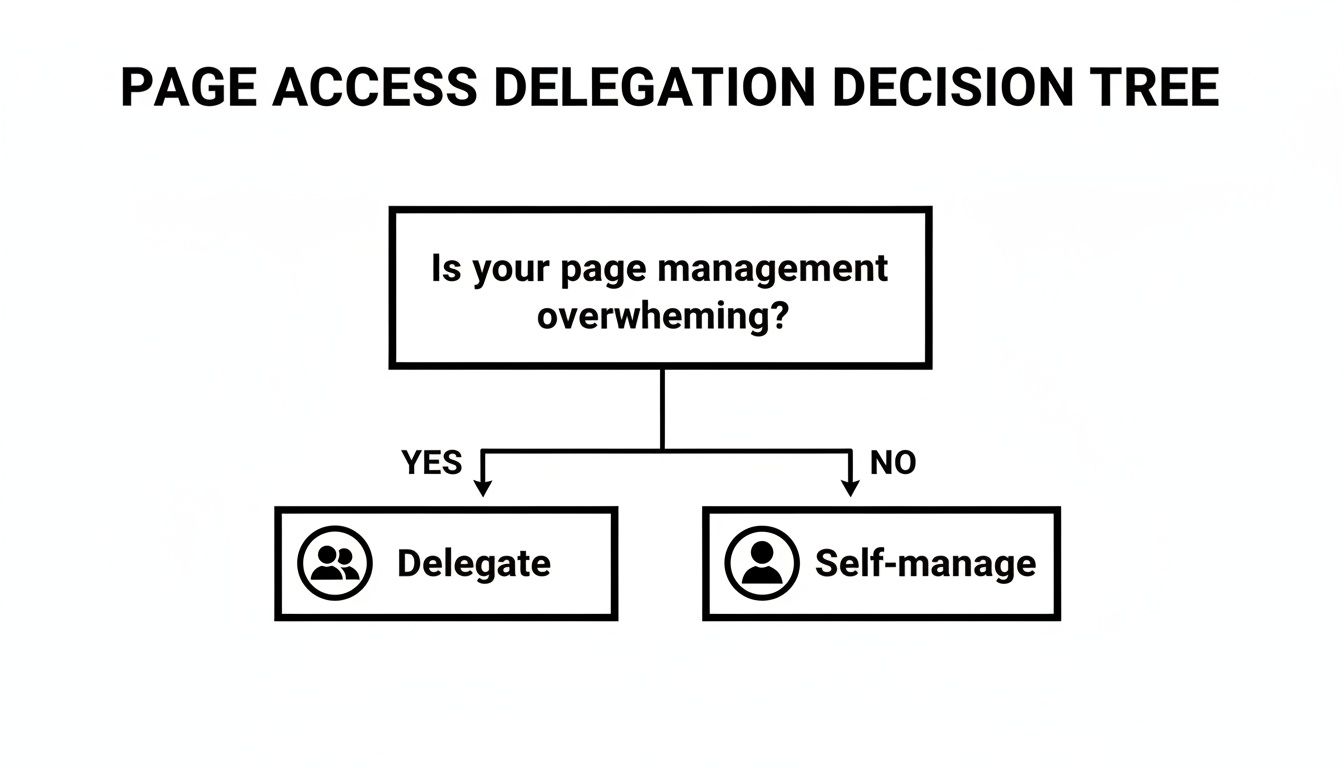
As you can see, delegation is usually the answer when you're feeling overwhelmed—a common growing pain for businesses trying to keep up with their social media.
Full Control vs. Task Access
Facebook's current system makes things a lot simpler by splitting permissions into two main buckets: Full Control and Task Access. This setup replaces the older, more confusing roles (like Editor, Moderator, Analyst) and lets you assign permissions that actually match someone's job.
Full Control is exactly what it sounds like—the highest level of access possible. This is the true "admin" role. Anyone with Full Control has the same power as the Page's original creator, including the ability to add or remove other people and even delete the Page entirely.
Task Access, on the other hand, is for granting specific permissions without handing over control of everything. It's perfect for team members, agencies, or freelancers with well-defined roles. You could, for example, give someone permission to create posts and respond to comments but block them from touching your ad accounts or Page settings.
Pro Tip: Always follow the "principle of least privilege." This is a core security best practice that simply means you should only give people the minimum level of access they absolutely need to do their job. It dramatically cuts down the risk of security breaches or unauthorized changes.
For instance, a social media manager probably just needs Task Access to schedule content and handle community engagement. This lets them work effectively while keeping your core settings safe. A business partner, however, would need Full Control to oversee everything from finances to who has access to the Page.
Facebook Page Access Levels: A Quick Comparison
To help you make the right call, you need a clear picture of what each access level really allows. The differences are massive, especially when it comes to high-stakes actions like managing money or assigning roles to others.
This table breaks down the key permissions for the main access levels on a Facebook Page, helping you decide who gets what level of control.
| Permission | Full Control (Admin) | Task Access (e.g., Editor, Moderator) |
|---|---|---|
| Manage Page Settings & Info | ✅ Yes | ❌ No |
| Assign & Manage Page Roles | ✅ Yes | ❌ No |
| Delete the Page | ✅ Yes | ❌ No |
| Create, Manage, or Delete Content | ✅ Yes | ✅ Yes (if assigned) |
| Send Messages as the Page | ✅ Yes | ✅ Yes (if assigned) |
| Respond to & Delete Comments | ✅ Yes | ✅ Yes (if assigned) |
| Create, Manage, & Delete Ads | ✅ Yes | ✅ Yes (if assigned) |
| View Page Insights & Performance | ✅ Yes | ✅ Yes (if assigned) |
| Manage Linked Accounts (e.g., Instagram) | ✅ Yes | ✅ Yes (if assigned) |
| Manage Page Financials & Payouts | ✅ Yes | ❌ No |
It's pretty clear: Full Control is the all-access pass. Reserve this for only the most trusted individuals in your business, like co-founders or top executives. For nearly everyone else—from your content creator to your ad specialist—Task Access strikes the perfect balance between giving them the tools they need and protecting your assets.
Alright, now that you know the critical difference between Full Control and Task Access, let's get into the nuts and bolts of how to actually add an admin to a Facebook Page. Whether you’re at your desk or managing things on the fly, the process is pretty simple once you know where to click.
We’ll cover the steps for both desktop and the Facebook mobile app. One quick pro-tip before we start: always, always double-check the name or email of the person you're inviting. Sending powerful permissions to the wrong person is a simple mistake that can cause a massive headache.
Also, keep in mind the person you’re adding must have their own personal Facebook profile. You can’t assign a role to another business page or a generic business account; it has to be tied to an actual person.
Adding a Page Admin on Desktop
For most of us, the desktop interface is the command center for page management. Facebook has thankfully streamlined this over the years, tucking all the role management settings into one easy-to-find spot.
First, head over to your Facebook Page while logged into your personal profile (the one with admin access). From there, you'll need to "switch" into your Page's profile to get to its specific settings.
Once you’re acting as your Page, here’s the path to follow:
- Click your Page’s profile picture in the top-right corner.
- Select Settings & privacy, then click Settings.
- In the menu on the left, find and click on New Pages Experience.
- This will open a new menu. Choose Page Access.
This "Page Access" screen is your central hub for everything role-related. You can see who currently has access and add new people. You'll notice two main sections: "People with Facebook access" and "People with task access."
To grant someone full admin permissions, you'll use the "People with Facebook access" option.
Just click the Add New button next to it. A screen will pop up explaining what Full Control really means. After you click Next, search for the person by their name or the email address they use for Facebook. Once you find the right person, select them, confirm the permissions you want them to have, and click Give Access.
For your own security, Facebook will ask you to re-enter your password to confirm you’re the one making this change. It’s a crucial step to prevent unauthorized changes. The person you invited will then get a notification to accept the role, which is valid for 31 days.
Assigning Page Roles on the Mobile App
Let's be real—managing a business page doesn't always happen from behind a computer. Luckily, you can just as easily add an admin to a Facebook Page right from your phone using the Facebook app. The flow is almost identical to the desktop version, just optimized for a smaller screen.
Start by opening your Facebook app and switching over to your Page's profile. You can usually do this by tapping your profile picture and selecting your Page from the list.
Now that your Page's profile is active, tap the menu icon (the three horizontal lines). From there, it's just a few taps:
- Scroll down and tap Settings & Privacy, then tap Settings.
- Tap on Page Settings.
- Scroll down until you see the "New Pages Experience" section and tap on Page Access.
You’ve landed on the same management screen you saw on the desktop. The process from here is exactly the same. Tap the Add New button next to "People with Facebook access," search for the person you want to add, and follow the on-screen prompts to send out the invitation.

As you can see, the interface keeps things clean by separating "Facebook access" (admins) from the more limited "Task access," so it's easy to grant the right level of permission.
So, What Happens After You Send the Invite?
Sending the invitation is just the first step. The person you invited has to actually accept the role before they get any access. They’ll get a notification on Facebook letting them know you've invited them to help manage your Page.
When they click that notification, they'll be asked to review the permissions you’ve granted. To finalize everything, they need to click "Accept."
If they don’t get around to accepting it within 31 days, the invitation will expire, and you'll have to go through the process and send it again.
Until they accept, their name will show up in your "Page Access" section with a "Pending" status next to it. This is a handy way to keep track of who you've invited and to give a gentle nudge to anyone who might have missed the notification.
Using Meta Business Suite to Manage Team Access
When you're running a serious business, juggling a single Facebook Page just doesn't cut it anymore. For agencies, marketers, or any company managing multiple pages, ad accounts, and team members, Meta Business Suite is your professional command center. It transforms access management from a clumsy, page-by-page task into a secure, centralized system.
Think of it this way: adding an admin directly on a Facebook Page is like handing over a key to one room in a building. Using Business Suite is like giving them a master keycard you can program from a central security desk, granting access only to the specific rooms and floors they need. You get far more control and a bird's-eye view of all your digital assets.
This is absolutely essential for agencies. Picture onboarding a new client. You need to give your team of marketers and ad specialists access to the client’s Facebook Page and their ad account. Doing that one by one is a recipe for headaches and mistakes. Business Suite lets you add your team members once and then assign them to the necessary assets in just a few clicks.
Navigating to Business Suite Settings
The way you add an admin to a Facebook Page through Business Suite is completely different because you're not just adding someone to a Page—you're adding them to your business. They are invited into your entire ecosystem, and from there, you decide what they can touch.
First, you'll need to get into your Meta Business Suite. The easiest way is to go directly to business.facebook.com, but you can often find a link from your Page’s professional dashboard.
Once you’re in, here’s what to do:
- Find the Settings cogwheel icon, which is usually hiding at the bottom of the left-hand navigation menu.
- From the Settings menu, look for the "Users" category and click on People.
- Hit the blue Add people button to get the invitation process started.
This is where you'll see the real advantage of Business Suite. You're not just adding a name to a list; you're bringing someone into a controlled environment where their access can be fine-tuned across every single asset you manage.
Assigning Roles and Permissions
After clicking "Add people," a window will pop up asking for their work email address. It's really important to use their professional email to keep business and personal accounts separate and secure.
Next, you have to assign them a role within the business itself. You can choose Employee access, which is the default and the best choice for most team members, or Admin access. Be incredibly careful with Admin access—it gives them full control over your entire Business Portfolio.
The most critical step is next: assigning access to specific assets. This is where you actually connect the person to the Facebook Page. You'll see a list of every Page, ad account, and pixel connected to your Business Suite.
Just select the Facebook Page you want them to manage. A new panel will appear on the right where you can toggle the exact permissions they need, from creating basic content all the way to having full administrative control over that specific Page. This level of granular control is the number one reason to use Business Suite.
If you're running campaigns, a solid grasp of the ad platform is a must. We cover everything you need to know in our Facebook Ads Manager tutorial, which is the perfect next step after mastering page management.
Once you’ve set up their permissions, send the invitation. They'll get an email to formally join your business on Meta Business Suite, making the whole onboarding process clean and professional.
To really streamline your operation, think about integrating Business Suite with some of the best social media management tools. This combo gives you a powerhouse setup, letting you manage everything from a single, integrated hub.
Securely Managing Your Facebook Page Admins
Handing someone the keys to your business's digital front door is a big deal. When you add an admin to your Facebook page, you're not just sharing the workload; you're entrusting them with a powerful company asset. That's why putting a few core security practices in place isn't just a good idea—it's non-negotiable for protecting your page from costly mistakes or, worse, a malicious takeover.

The single most important concept here is the principle of least privilege. It’s a simple but incredibly effective idea: only give people the absolute minimum level of access they need to do their job. Not everyone needs the keys to the entire kingdom.
For instance, a freelance content creator probably just needs Task Access to schedule posts and check on performance. Giving them Full Control is an unnecessary risk that opens you up to problems down the line. This one strategy dramatically shrinks your vulnerability if a team member's account ever gets compromised.
The Importance of Regular Audits
Your list of page admins should never be a "set it and forget it" situation. It's vital to regularly audit who has access and why. I recommend getting into the habit of reviewing your user list quarterly, or any time a team member's role changes.
These audits are your chance to find and remove access for:
- Former Employees: This is the most common security hole I see. An ex-employee with lingering admin access is a massive liability.
- Past Contractors or Agencies: Once their project is wrapped up, their access should be revoked on the same day.
- Inactive Accounts: Team members who’ve moved to other projects and no longer touch your social media should be removed to keep things tight.
Getting rid of outdated permissions is one of the simplest and most effective ways to safeguard your page. Think of it like changing the locks after someone moves out—it's just good sense.
Enforcing Two-Factor Authentication
If there's one security measure you should push for, it's requiring two-factor authentication (2FA) for anyone with access to the page. 2FA adds that critical second layer of security, making it exponentially harder for a hacker to get in, even if they somehow steal a password.
You can often see which of your page admins have 2FA enabled right inside your Page Access settings. While you can't flip the switch for them, you absolutely should make it a mandatory internal policy for anyone managing company assets. This is especially important for understanding the nuances of Facebook login authentication terms and ensuring your whole team is on the same page.
A cautionary tale: I once saw a local restaurant lose complete control of its page with over 50,000 followers. A former manager's account was compromised because they didn't have 2FA enabled. The hacker got in, immediately removed all the other admins, and started posting malicious content. Years of community-building were destroyed in just a few hours.
This kind of proactive security is essential on a platform with 3.065 billion monthly active users. Good page management directly impacts results, too. Pages with highly active admin teams can hit engagement rates as high as 1.72%, which completely blows away the average 0.06% fan engagement rate. When the stakes are that high, strong security protocols are vital. You can dig into more of these powerful Facebook statistics on SocialPilot.co.
Got Questions About Adding Facebook Admins?
Even when you follow the steps perfectly, trying to add an admin to a Facebook Page can sometimes hit a weird snag. Maybe an invitation disappeared, or you can't find the person you're trying to add. Don't worry, you're not the first person to get stuck.
Let's walk through some of the most common hurdles people face and get you the right answers so you can get back to business.
Why Did My Admin Invitation Expire?
So, you sent the invite, but the person you added says the link is dead. This is a super common one. When you send an admin invitation from your Facebook Page, it's only good for 31 days.
If your new team member didn't see the notification or just got busy and forgot to accept it in time, that invitation simply expires.
You can't "reactivate" it. The only fix is to head back into your Page Access settings and send a brand new one. A good pro-tip is to send the person a quick message right after you send the invite. A simple "Hey, just sent you the admin request for the Page, let me know when you've accepted it!" can save you from having to do it all over again a month later.
What if the Person I Want to Add Doesn’t Show Up in the Search?
This is easily the most frustrating part of the whole process. You type in their name or email, and… crickets. Nothing shows up.
A few things could be happening here:
- You aren't Facebook friends: Facebook's search heavily favors people you're already connected with. If you aren't friends, their profile might not pop up.
- You're using the wrong email: You have to use the exact email address they used to sign up for their personal Facebook profile. A work email is useless if their account is tied to their personal Gmail.
- Their privacy settings are locked down: Some people have strict privacy settings that block others from finding them by searching their email address.
The fastest and most reliable fix is almost always to become Facebook friends, at least for a minute. Send a friend request, have them accept, and then add them as an admin. You can always unfriend them right after they're in, no hard feelings.
Can I Add Another Facebook Page as an Admin?
The short answer is no. You can't make a Facebook Page an admin of another Page. Meta designed roles and permissions to be assigned to real people with personal Facebook profiles.
This is a core security feature. Every post, comment, or settings change is logged and tied to an individual person. This creates accountability. If a Page could be an admin, you'd never know who from that business was actually doing the work.
If you're working with an agency or another company, you have to invite a specific person from that company to manage your Page. They'll use their personal profile to log in and access the tools. This is precisely why professionals use Meta Business Suite—it keeps all these permissions clean, secure, and separate from personal accounts.
How Can I Remove an Admin from My Facebook Page?
Knowing how to remove someone's access is just as critical as adding it, especially when an employee, contractor, or agency partnership ends.
The good news is it's simple. Just go back to the same Page Access screen you used to add them.
You'll see a list of everyone with access. Find the person you need to remove, click the three-dot icon next to their name, and hit Remove Access.
Facebook will ask you to re-enter your password to confirm—this is a final security check. Once you do, their access is revoked instantly. Don't ever skip this step in your offboarding process!
Ready to stop downloading CSV files and get your Facebook leads delivered instantly? LeadSavvy Pro automates the entire process, sending new leads directly to your Google Sheet or CRM. Start for free and connect your Facebook Page in minutes at LeadSavvy Pro.