Your Guide to Facebook Lead Ads Google Sheets Integration
Tired of manually downloading CSV files from Facebook just to get your leads into a spreadsheet? It's a massive time-waster and, frankly, a terrible way to handle hot leads. A direct Facebook Lead Ads Google Sheets integration changes the game completely. It zaps new leads from your campaigns straight into a Google Sheet the moment they come in.
This one simple automation shifts your team's focus from mind-numbing data entry to what actually matters: engaging with potential customers while they're still interested.
Why You Absolutely Need to Automate Your Facebook Lead Flow
Let's be real—manually downloading lead data is a major bottleneck in any sales process. Every minute you spend fumbling with a CSV file is a minute that lead is getting colder. Automating this isn't just a nice-to-have; it's a competitive necessity that directly boosts your bottom line.
By connecting your lead ads directly to a Google Sheet, you're essentially creating a living, breathing database of your prospects. This real-time view gives your sales team the power to pounce on new opportunities instantly. And in sales, speed is everything.
Speed and Accuracy: The Automation Edge
The biggest win here is speed. When a potential customer gives you their info, it should land in front of your sales team right away, not get stuck in Facebook's system waiting for you to remember to download it. That immediacy is what turns a simple form submission into a real conversation.
On top of that, automation kills human error. No more copy-paste blunders, accidentally missed files, or messed-up formatting. Every single lead is transferred perfectly, every time. This means your team can always trust the data they're working with.
It all boils down to this: The faster you follow up, the higher your odds of making a sale. Automation closes the gap between someone showing interest and your team reaching out to just a few seconds.
Moving Past Manual Work and Into Real-Time Sync
Ever since Facebook rolled out Lead Ads back in 2015, marketers have been stuck in the cycle of manual downloads. Thankfully, a whole ecosystem of tools has popped up to fix this problem with simple integrations. These tools create a bridge that allows for near-instant synchronization between Facebook and Google Sheets.
This setup transforms your Google Sheet from a boring, static report into a live sales dashboard. To really understand how this fits into a bigger picture, it's worth exploring broader automated lead generation strategies.
To see just how big of a difference this makes, let's compare the old way with the new way.
Manual CSV Downloads vs Automated Integration
| Metric | Manual Process (CSV Download) | Automated Integration |
|---|---|---|
| Lead Delivery Speed | Hours or days (delayed) | Seconds (instant) |
| Data Accuracy | Prone to human error (copy/paste) | 100% accurate, no errors |
| Team Workflow | Reactive, manual data checks | Proactive, focused on selling |
| Lead "Temperature" | Cold or lukewarm by first contact | Hot and engaged |
| Time Spent | 15-30 minutes per day | 0 minutes (fully automated) |
As you can see, the choice is pretty clear. Automation doesn't just save time; it creates a more effective, responsive, and ultimately more profitable sales process. This single integration frees up your team to focus on building relationships and closing deals.
Your Pre-Integration Checklist for a Flawless Setup

Before you dive in and start connecting things, let’s talk prep work. I've learned from experience that just a few minutes of setup now can save you from some major headaches later. Think of this as your pre-flight check for a successful Facebook Lead Ads to Google Sheets integration.
First up, make sure you have the right permissions. You absolutely need admin access to the Facebook Page where your ads are running. If you don't, tools like LeadSavvy Pro won't get the green light to fetch your lead data, and the whole process will stall before it even starts.
Prepare Your Google Sheet
Next, let's get your Google Sheet ready to catch those leads. Don't just create a blank sheet—set it up for success from the get-go.
- Create Clear Column Headers: Your column names should perfectly match the fields in your Facebook lead form. If your form asks for "First Name," "Email Address," and "Phone Number," your sheet should have those exact headers.
- Give It a Smart Name: Name your spreadsheet something you'll recognize instantly, like "Q4 Campaign – Facebook Leads." This simple step is a lifesaver when you're managing multiple campaigns.
- Pre-format Your Columns: Keep your data clean by formatting columns for specific info. For instance, set the phone number column to "Plain Text" to keep any leading zeros. For dates, format the column as
MM/DD/YYYYso everything is uniform.
A well-organized Google Sheet is the bedrock of your entire automated workflow. Taking the time to structure it correctly means your lead data isn't just captured—it's organized and ready for your sales team to use immediately.
This prep work is a crucial part of building a system you can actually rely on. For a closer look at why this matters, check out our guide on how to automate lead generation and make your marketing a whole lot smarter.
With your permissions sorted and your spreadsheet prepped, you're ready for a smooth, error-free integration.
Alright, with your permissions squared away and your Google Sheet ready for action, it’s time to build the bridge between your platforms. This is where the magic of a Facebook Lead Ads Google Sheets integration happens, and with a tool like LeadSavvy Pro, it's surprisingly simple. The first thing you'll do is securely connect your accounts.
You’ll start by giving the automation tool permission to access your Facebook Page and the ad account tied to it. This is a totally secure, standard process that uses Facebook's official system, so your login details are always kept private. After Facebook is hooked up, you'll repeat the process for your Google account, which lets the tool add new rows to the spreadsheet you set up.
Selecting Your Source And Destination
Once your accounts are authenticated, you get to play traffic controller. You'll tell the tool exactly where to pull the leads from and precisely where to send them.
This means you’ll pick the specific Facebook Page and the exact lead form you want to sync. Got multiple campaigns running for different offers? No problem. You can just set up a separate automation for each one.
Next, you'll select the Google Sheet you prepped earlier as the final destination. The tool will show you a list of your spreadsheets, making it easy to find the one you named something like "Q4 Campaign – Facebook Leads."
This visual shows exactly how your Google Sheet should look to seamlessly catch the lead data as it comes in.
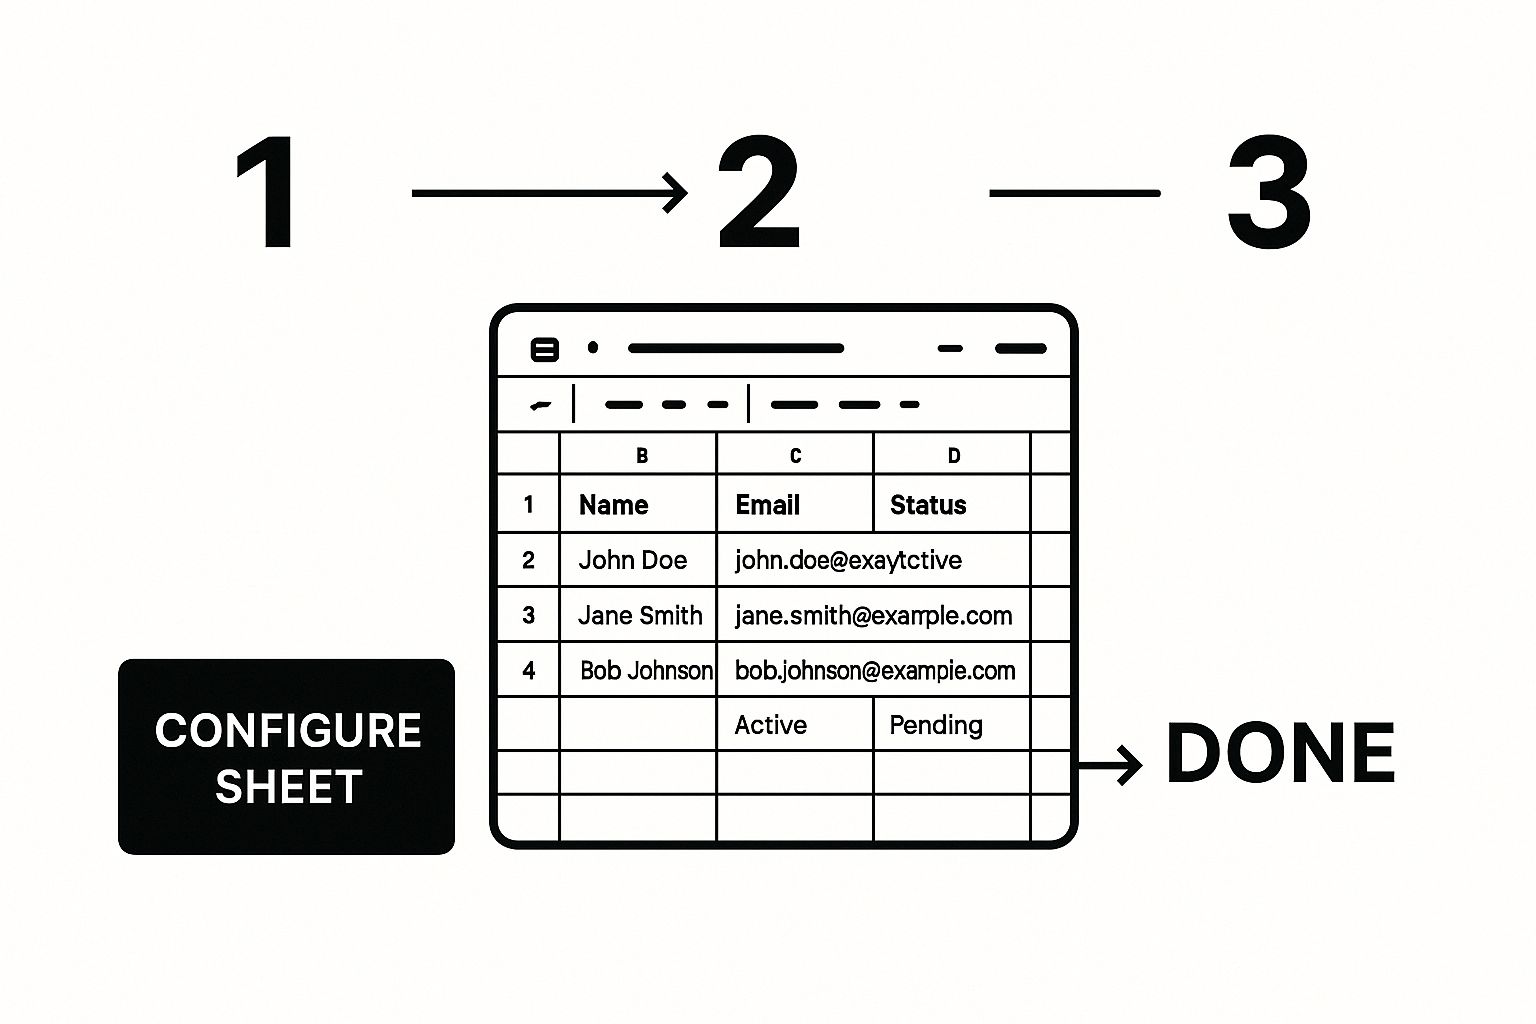
As you can see, having those columns clearly defined beforehand is crucial. It ensures every piece of incoming lead data lands in the perfect spot. If you want to dive deeper into making this process even more powerful, our complete guide can show you how to fully automate Facebook leads from start to finish.
At its core, this step is just you telling the tool: "Hey, when a new lead comes from this specific Facebook form, I want you to immediately add it as a new row in this specific Google Sheet."
The interface in a tool like LeadSavvy Pro is built to feel intuitive, usually guiding you with simple dropdown menus so you can’t go wrong. You're just a few clicks away from having a fully automated lead workflow.
Mapping Your Fields for Perfect Data Transfer
Once your accounts are connected, we get to the most important part of the whole setup: field mapping. This is where you tell LeadSavvy Pro exactly which data from your Facebook form should go into which column in your Google Sheet. Think of it like giving your data a precise set of GPS coordinates.
Getting this right is what makes a Facebook Lead Ads Google Sheets integration so incredibly effective. It ensures a lead's first name doesn't accidentally end up in the email column. You'll see a simple interface where you just match each form field to its corresponding spreadsheet header.
Matching Standard and Custom Fields
The basics are easy—you’ll map "First Name" from Facebook to your "First Name" column in Google Sheets, "Email" to "Email," and so on. But the real magic happens when you start mapping your custom questions.
Let's say you run a gym and your lead form asks, "What's your primary fitness goal?" You can map this custom question directly to a "Fitness Goal" column in your sheet. Boom. Your new leads are instantly segmented, which means your sales team can tailor their follow-up call immediately. They can open the conversation talking about weight loss or muscle gain, not just a generic pitch.
The goal of field mapping isn't just to move data; it's to transfer intelligence. By including campaign-specific details, every new lead arrives with the context your sales team needs to have a more relevant and effective conversation.
This simple step transforms your spreadsheet from a static list into a dynamic sales tool.
Including Hidden Campaign Data
Here’s a pro-level tip that adds a ton of context to every single lead: you can automatically capture valuable metadata that users don't even see.
- Campaign Name: Map this to see which specific ad campaign generated the lead.
- Ad Set Name: Pinpoint the exact audience that’s performing best.
- Ad Name: Identify the ad creative that drove the conversion.
- Submission Date: Automatically timestamp every new entry for better tracking.
Including this data is effortless with a tool like LeadSavvy Pro. You just select these system-generated fields and map them to dedicated columns in your Google Sheet. Now, you’re not just collecting leads; you’re collecting actionable performance data right alongside them, all in one organized place.
Alright, you’ve done the heavy lifting. The connection is built, your fields are perfectly mapped—now it’s time for the fun part: flipping the switch and watching it work.
Activating your new workflow in a tool like LeadSavvy Pro is usually a one-click affair. But hold on. Before you pop the champagne and launch your ad campaign, you absolutely must make sure every part of your automated system is firing on all cylinders.
This is where a little-known hero comes into play: Facebook’s own Lead Ads Testing Tool.
Run a Quick Test (It's Free!)
Think of this tool as your pre-flight check. It’s a free utility from Facebook that lets you submit a real, sample lead through your exact ad form without spending a dime on live ads. It's the ultimate way to get peace of mind before you start spending your budget.
Go ahead and submit a test lead. Play the part of a potential customer. I always recommend using obviously fake info, like "Testy McTesterson" or an email like "test123@test.com," so you can easily spot it in your Google Sheet.
Once you hit submit, switch over to your spreadsheet.
Within a minute or two—sometimes even seconds—you should see a new row magically appear with all the test data you just entered. If you see it, take a moment to celebrate. Your Facebook Lead Ads Google Sheets integration is officially working!
This simple test isn't just a formality. It’s the final quality check on your entire setup. It confirms your authentication, field mapping, and the connection itself are all working together seamlessly, so you know for a fact that your real, valuable leads will be captured flawlessly.
Now, before you move on, quickly scan the new row in your sheet:
- Are the columns right? Is the first name actually in the "First Name" column? Is the email formatted correctly?
- Did the metadata pull through? Check those hidden fields. Did the "Campaign Name" and "Ad Set Name" show up like you wanted?
- What about custom questions? Is the answer to your unique question sitting in the right spot?
This final check ensures your lead data isn't just arriving, but that it's clean, organized, and ready for your sales team to act on immediately.
For a deeper dive into this process, you can check out our full guide on sending Facebook leads to Google Sheets.
Got your new Facebook Lead Ads to Google Sheets integration set up? Awesome. But even with a slick automation running, it’s totally normal to have a few questions pop up about how it all works in the real world.
Let's dive into some of the most common things marketers ask. Getting these answers down will help you manage your new lead flow like a pro.
How Quickly Will My New Leads Actually Show Up in Google Sheets?
This is probably the number one question, and for good reason—speed is the whole point!
You can expect new leads to land in your Google Sheet in near real-time. A solid tool like LeadSavvy Pro is built for this, typically syncing a new lead from Facebook in just 1 to 5 minutes.
That tiny delay is just the time it takes for Facebook’s system to register the lead and for the tool to pick it up. It’s a world away from the hours (or even days) you might spend manually downloading CSV files. Your sales team gets to jump on a lead while it's still piping hot.
Can I Send Leads from Multiple Facebook Forms to the Same Google Sheet?
Yes, you absolutely can. This is a huge win for anyone running different campaigns or offers at the same time. You’ve got a couple of great ways to organize everything:
- Create a "Master List": Funnel all your leads from every form into one main worksheet. This gives you a fantastic bird's-eye view of all your prospects in one place.
- Use Separate Tabs for Segmentation: This is my personal favorite for keeping things tidy. You can send leads from each form to a different tab (or "worksheet") inside the same Google Sheet. For example, a tab for "Ebook Download" leads and another for "Webinar Signup" leads.
This flexibility means you can set up your data exactly how your team works best, without juggling a dozen different files.
The goal of any good integration is to make your life simpler, not more complicated. Being able to route leads from different ads into one organized sheet is a perfect example of that.
What Happens If I Change My Facebook Form or My Google Sheet?
This is a super important point, so pay close attention. If you make changes, your automation needs to know about them.
If you edit your Facebook lead form—say, you add a new question or get rid of one—you must go back into your automation tool and update the field mapping. The system isn't a mind reader; it won't automatically know where to put that new piece of information.
The same goes for your Google Sheet. If you rename or delete a column that your automation is sending data to, the connection will break.
Best practice: Always pause the automation first. Then, make your changes in both Facebook and Google Sheets. Finally, go back into the tool, re-map your fields to match the new setup, and turn the automation back on. A few extra clicks here will save you from a major headache later and keep your leads flowing without a hitch.
Stop wasting time chasing down CSV files and start converting leads the moment they show interest. LeadSavvy Pro makes it almost too easy, syncing your leads to Google Sheets in minutes. Get started for free today and see what a difference real-time automation makes.

